Implementing Two Factor Authentication in Laravel
In this article we will cover How to setup Two Factor Authentication in Laravel on top of Laravel Basic Authentication. We will be using Google2FA-Laravel Package for the same. (pragmarx/google2fa-laravel)
Before Moving on, Let's first understand briefly about Two Factor Authentication.
Two Factor Authentication (2FA), often referred to as Two-Step-Verification, is a security process in which the user provides two authentication factors to verify they are who they say they are.
Two-Factor Authentication provides an additional layer of security that makes it harder for attackers to gain access to person’s device and online accounts because knowing the victim’s password is alone is not enough to pass the authentication check.
As we dig into the steps, make sure you have following ready. Alright Let's dig into the step.
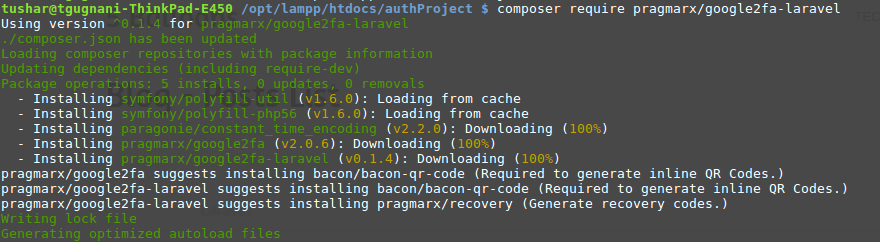
Install Required Composer Packages
First let's setup the required packages, this will help us implement Google2FA backed two factor Authentication into our project. Open you terminal move to the project root. Execute following commands.composer require pragmarx/google2fa-laravel
composer require bacon/bacon-qr-code Let's go ahead and publish the
 ServiceProvider class which is installed under pragmarx/google2fa-laravel package.
php artisan vendor:publish --provider="PragmaRX\Google2FALaravel\ServiceProvider"New Model, Migration, Controller and Database Table for 2FA
Next we need the following- A database table to store the data related to two factor authorization.
- A Model file against the table.
- A Controller file to handle 2FA
php artisan make:model PasswordSecurity -m -c We are naming our new Model
 PasswordSecurity, this table will be used to store two factor secret and you can also use it to store user specific advanced password security properties.
This command will generate following things for you
- A Model named
PasswordSecurity.phpunder App directory - A migration file
create_password_securitiesunder Database / Migrations directory - A Controller file
PasswordSecurityController.phpunder App / Http / Controllers directory
create_password_securities
    public function up()
    {
        Schema::create('password_securities', function (Blueprint $table) {
            $table->increments('id');
            $table->integer('user_id');
            $table->boolean('google2fa_enable')->default(false);
            $table->string('google2fa_secret')->nullable();
            $table->timestamps();
        });
    }
- A
user_idfield which will be the foriegn key from the User table. - A boolean field
google2fa_enablewith default value of false, This will be used to enable/ disable 2FA authentication on user account. - A string field
google2fa_secretwhich will be used to store the random secret key used to authenticate and verify user's 2FA Authentication.
php artisan migrate:refresh
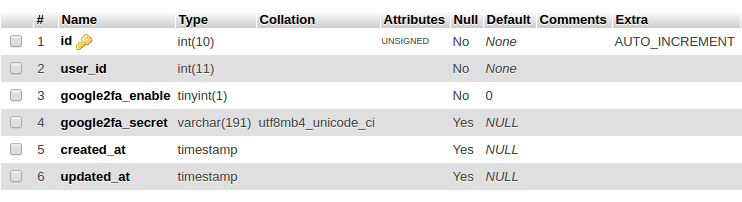
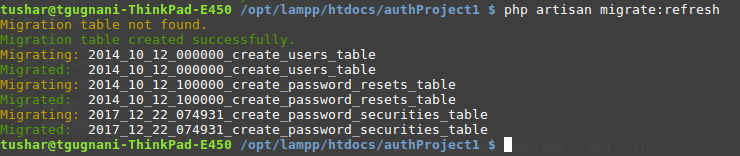 You should see the
 password_securities table in your database with following structure.
Defining Eloquent Relationship
Since now we have our database tables ready, Let's go ahead and assign relationship betweenUser and PasswordSecurity model. Every user will have exactly one row in password_securities table.
Thus we will assign one-to-one eloquent relationship between these two models.
Open User.php model file located at App directory and add following code into it.
    public function passwordSecurity()
    {
        return $this->hasOne('App\PasswordSecurity');
}PasswordSecurity.php model file located at App directory and add following code into it.
<?php

namespace App;

use Illuminate\Database\Eloquent\Model;

class PasswordSecurity extends Model
{

    protected $guarded = [];

    public function user()
    {
        return $this->belongsTo('App\User');
    }
}
Routes and Controller Method to Enable / Disable 2FA
Most of the applications allow their customers to Enable or Disable 2FA on their account. Let's create a 2FA Settings page where user can enable/disable the 2FA on his account, to enable user should scan the QR code and enter the OTP generated in Google Authenticator Mobile App. Thus if 2FA is enabled, user will need to provide a one time password after they successfully login with their username / password combination. Let's create necessary routes, controller method and view files to implement this functionality. Open yourweb.php file under Routes folder and add following routes into it.
Route::get('/2fa','PasswordSecurityController@show2faForm');
Route::post('/generate2faSecret','PasswordSecurityController@generate2faSecret')->name('generate2faSecret');
Route::post('/2fa','PasswordSecurityController@enable2fa')->name('enable2fa');
Route::post('/disable2fa','PasswordSecurityController@disable2fa')->name('disable2fa');PasswordSecurityController.php Controller file, Let's look into the Controller method's one by one
show2faform()
    public function show2faForm(Request $request){
        $user = Auth::user();

        $google2fa_url = "";
        if($user->passwordSecurity()->exists()){
            $google2fa = app('pragmarx.google2fa');
            $google2fa_url = $google2fa->getQRCodeGoogleUrl(
                '5Balloons 2A DEMO',
                $user->email,
                $user->passwordSecurity->google2fa_secret
            );
        }
        $data = array(
            'user' => $user,
            'google2fa_url' => $google2fa_url
        );
        return view('auth.2fa')->with('data', $data);
}- Secret Key Generation ( We create an entry into password_securiries table and store Secrey key into it)
- Verifiying OTP form Google Authenticator App (We ask user to enter code from Google Authenticator, to finally enable the 2FA on his account)
show2faform method we check if user has the google secret key generated (if(count($user->passwordSecurity))), If yes we proceed to show him the QR code.
[caption id="attachment_970" align="aligncenter" width="1202"]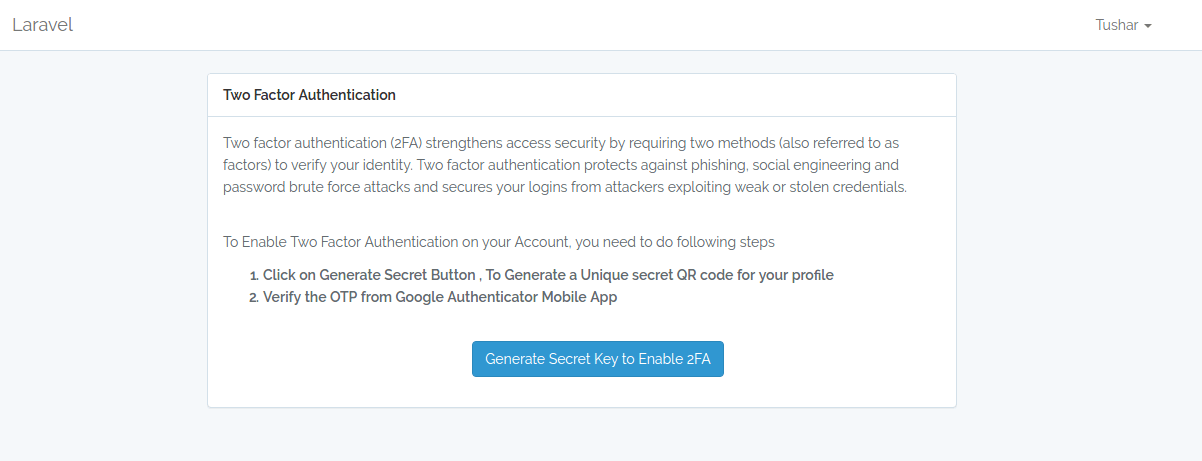 Laravel 2FA Step 1[/caption]
Clicking on Generate Secret Key Button makes a post request to
Laravel 2FA Step 1[/caption]
Clicking on Generate Secret Key Button makes a post request to generate2faSecret() method
generate2faSecret()
public function generate2faSecret(Request $request){
    $user = Auth::user();
    // Initialise the 2FA class
    $google2fa = app('pragmarx.google2fa');

    // Add the secret key to the registration data
    PasswordSecurity::create([
        'user_id' => $user->id,
        'google2fa_enable' => 0,
        'google2fa_secret' => $google2fa->generateSecretKey(),
    ]);

    return redirect('/2fa')->with('success',"Secret Key is generated, Please verify Code to Enable 2FA");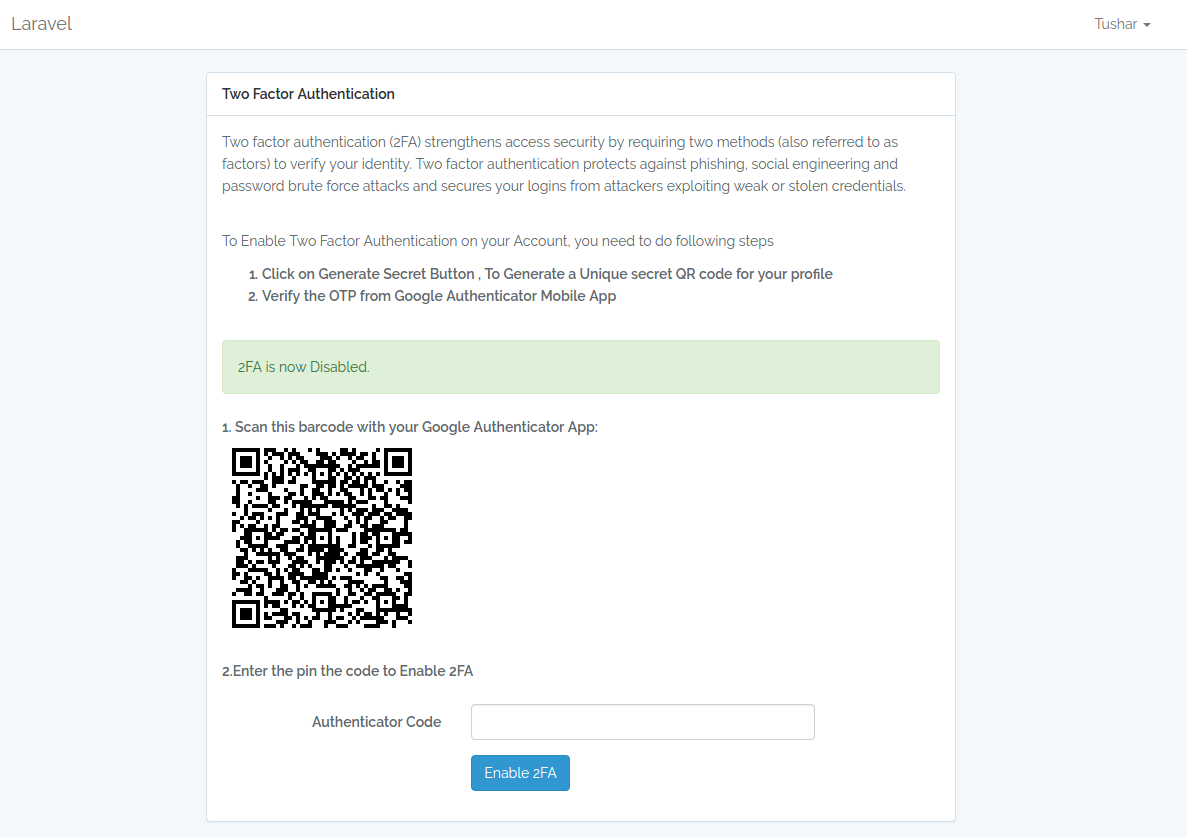
}password_securities table with the generated secret key.
[caption id="attachment_971" align="aligncenter" width="1178"] Laravel Enable 2FA Step 2[/caption]
Enter the OTP from Google Authenticator App and on Clicking on Enable 2FA Button makes a post request to
Laravel Enable 2FA Step 2[/caption]
Enter the OTP from Google Authenticator App and on Clicking on Enable 2FA Button makes a post request to enable2fa() method
enable2fa()
    public function enable2fa(Request $request){
        $user = Auth::user();
        $google2fa = app('pragmarx.google2fa');
        $secret = $request->input('verify-code');
        $valid = $google2fa->verifyKey($user->passwordSecurity->google2fa_secret, $secret);
        if($valid){
            $user->passwordSecurity->google2fa_enable = 1;
            $user->passwordSecurity->save();
            return redirect('2fa')->with('success',"2FA is Enabled Successfully.");
        }else{
            return redirect('2fa')->with('error',"Invalid Verification Code, Please try again.");
        }
}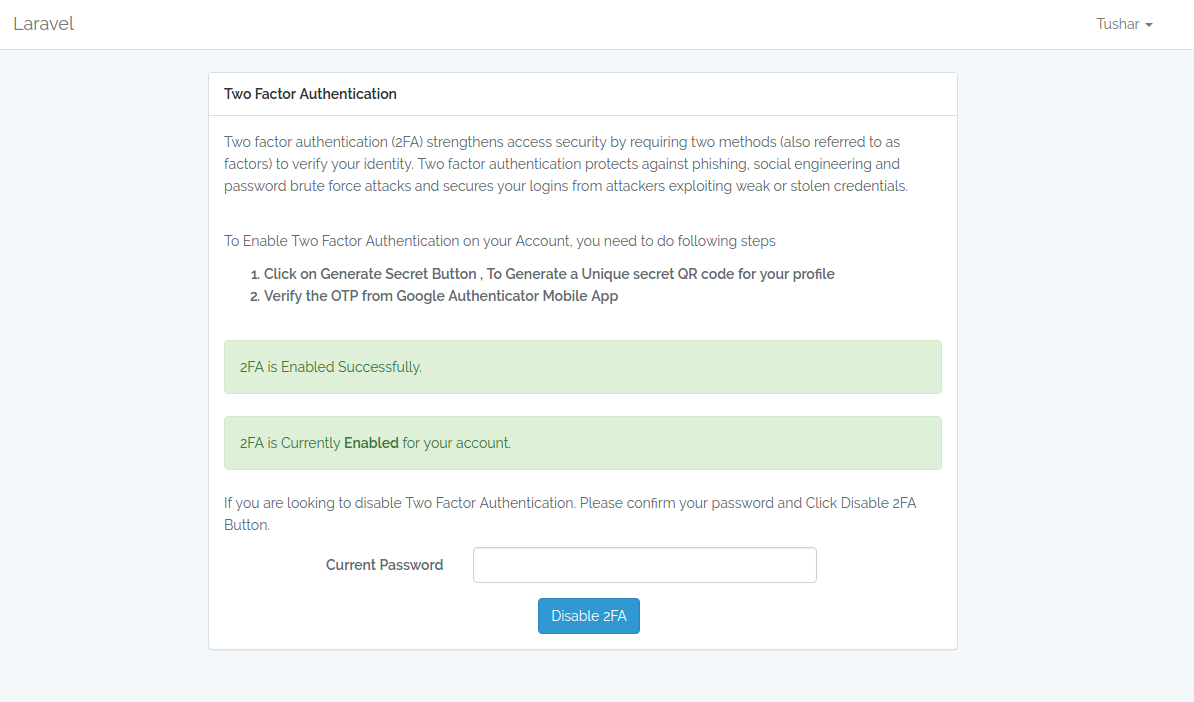 2FA Enabled Laravel[/caption]
To disable 2FA, user need to Enter the current account password and clicking on Disable 2FA Button makes a POST request to
2FA Enabled Laravel[/caption]
To disable 2FA, user need to Enter the current account password and clicking on Disable 2FA Button makes a POST request to disable2fa() method
disable2fa()
    public function disable2fa(Request $request){
        if (!(Hash::check($request->get('current-password'), Auth::user()->password))) {
            // The passwords matches
            return redirect()->back()->with("error","Your  password does not matches with your account password. Please try again.");
        }

        $validatedData = $request->validate([
            'current-password' => 'required',
        ]);
        $user = Auth::user();
        $user->passwordSecurity->google2fa_enable = 0;
        $user->passwordSecurity->save();
        return redirect('/2fa')->with('success',"2FA is now Disabled.");
} Create a new view file 2fa.blade.php under resources / views / auth folder , this will handle the triggering the above controller methods.
@extends('layouts.app')

@section('content')
    <div class="container">
        <div class="row">
            <div class="col-md-8 col-md-offset-2">
                <div class="panel panel-default">
                    <div class="panel-heading"><strong>Two Factor Authentication</strong></div>
                       <div class="panel-body">
                           <p>Two factor authentication (2FA) strengthens access security by requiring two methods (also referred to as factors) to verify your identity. Two factor authentication protects against phishing, social engineering and password brute force attacks and secures your logins from attackers exploiting weak or stolen credentials.</p>
                           <br/>
                           <p>To Enable Two Factor Authentication on your Account, you need to do following steps</p>
                           <strong>
                           <ol>
                               <li>Click on Generate Secret Button , To Generate a Unique secret QR code for your profile</li>
                               <li>Verify the OTP from Google Authenticator Mobile App</li>
                           </ol>
                           </strong>
                           <br/>

                       @if (session('error'))
                            <div class="alert alert-danger">
                                {{ session('error') }}
                            </div>
                        @endif
                        @if (session('success'))
                            <div class="alert alert-success">
                                {{ session('success') }}
                            </div>
                        @endif


                            @if(!count($data['user']->passwordSecurity))
                               <form class="form-horizontal" method="POST" action="{{ route('generate2faSecret') }}">
                                   {{ csrf_field() }}
                                    <div class="form-group">
                                        <div class="col-md-6 col-md-offset-4">
                                            <button type="submit" class="btn btn-primary">
                                               Generate Secret Key to Enable 2FA
                                            </button>
                                        </div>
                                    </div>
                               </form>
                            @elseif(!$data['user']->passwordSecurity->google2fa_enable)
                               <strong>1. Scan this barcode with your Google Authenticator App:</strong><br/>
                               <img src="{{$data['google2fa_url'] }}" alt="">
                           <br/><br/>
                               <strong>2.Enter the pin the code to Enable 2FA</strong><br/><br/>
                               <form class="form-horizontal" method="POST" action="{{ route('enable2fa') }}">
                               {{ csrf_field() }}

                               <div class="form-group{{ $errors->has('verify-code') ? ' has-error' : '' }}">
                                   <label for="verify-code" class="col-md-4 control-label">Authenticator Code</label>

                                   <div class="col-md-6">
                                       <input id="verify-code" type="password" class="form-control" name="verify-code" required>

                                       @if ($errors->has('verify-code'))
                                           <span class="help-block">
                                        <strong>{{ $errors->first('verify-code') }}</strong>
                                    </span>
                                       @endif
                                   </div>
                               </div>
                                   <div class="form-group">
                                       <div class="col-md-6 col-md-offset-4">
                                           <button type="submit" class="btn btn-primary">
                                               Enable 2FA
                                           </button>
                                       </div>
                                   </div>
                               </form>
                           @elseif($data['user']->passwordSecurity->google2fa_enable)
                               <div class="alert alert-success">
                                   2FA is Currently <strong>Enabled</strong> for your account.
                               </div>
                               <p>If you are looking to disable Two Factor Authentication. Please confirm your password and Click Disable 2FA Button.</p>
                               <form class="form-horizontal" method="POST" action="{{ route('disable2fa') }}">
                               <div class="form-group{{ $errors->has('current-password') ? ' has-error' : '' }}">
                                   <label for="change-password" class="col-md-4 control-label">Current Password</label>

                                   <div class="col-md-6">
                                       <input id="current-password" type="password" class="form-control" name="current-password" required>

                                       @if ($errors->has('current-password'))
                                           <span class="help-block">
                                        <strong>{{ $errors->first('current-password') }}</strong>
                                    </span>
                                       @endif
                                   </div>
                               </div>
                               <div class="col-md-6 col-md-offset-5">

                                       {{ csrf_field() }}
                                   <button type="submit" class="btn btn-primary ">Disable 2FA</button>
                               </div>
                               </form>
                            @endif
                        </form>
                    </div>
                </div>
            </div>
        </div>
    </div>
@endsection
Two Step Verification with 2FA Middleware
google2fa-laravel package provides us with a middleware that can be directly used to enable the two factor Authentication. However at this point if we include the middleware directly it will enable the 2FA on all accounts. Since we are looking to enable Two Factor only on those accounts which has 2FA enabled in their profile, We need to extend package's Authenticator class for that. Create a Support directory under App folder and create a new ClassGoogle2FAAuthenticator.php in it, This class will extend the Authenticator class of google2fa-laravel package.
<?php

namespace App\Support;

use PragmaRX\Google2FALaravel\Support\Authenticator;

class Google2FAAuthenticator extends Authenticator
{
    protected function canPassWithoutCheckingOTP()
    {
          if(!count($this->getUser()->passwordSecurity))
              return true;
          return
            !$this->getUser()->passwordSecurity->google2fa_enable ||
            !$this->isEnabled() ||
            $this->noUserIsAuthenticated() ||
            $this->twoFactorAuthStillValid();
    }

    protected function getGoogle2FASecretKey()
    {
        $secret = $this->getUser()->passwordSecurity->{$this->config('otp_secret_column')};

        if (is_null($secret) || empty($secret)) {
            throw new InvalidSecretKey('Secret key cannot be empty.');
        }

        return $secret;
    }


}canPassWithoutCheckingOTP to exclude accounts which does not have 2FA Enabled.
We have also modified getGoogle2FASecretKey to modify the location of the column where we store our secret key.
Let's Create a new Middleware class that will refer to our extended Google2FAAuthenticator class.
Create a new class Google2FAMiddleware.php in directory App / Http / Middleware with following code.
<?php

namespace App\Http\Middleware;

use App\Support\Google2FAAuthenticator;
use Closure;

class Google2FAMiddleware
{
    /**
     * Handle an incoming request.
     *
     * @param  \Illuminate\Http\Request  $request
     * @param  \Closure  $next
     * @return mixed
     */
    public function handle($request, Closure $next)
    {
        $authenticator = app(Google2FAAuthenticator::class)->boot($request);

        if ($authenticator->isAuthenticated()) {
            return $next($request);
        }

        return $authenticator->makeRequestOneTimePasswordResponse();
    }
}
Kernel.php
protected $routeMiddleware = [
    ...
    '2fa' => \App\Http\Middleware\Google2FAMiddleware::class,
];public function __construct()
{
$this->middleware(['auth', '2fa'] );
}Route::get('/admin', function () {
return view('admin.index');
})->middleware(['auth', '2fa']);config / google2fa.php config file to change the view file, which will be shown to user as a two step verification.
'view' => 'auth.google2fa',google2fa.blade.php under views/ auth directory.
@extends('layouts.app')

@section('content')
    <div class="container">
        <div class="row">
            <div class="col-md-8 col-md-offset-2">
                <div class="panel panel-default">
                    <div class="panel-heading">Two Factor Authentication</div>
                       <div class="panel-body">
                           <p>Two factor authentication (2FA) strengthens access security by requiring two methods (also referred to as factors) to verify your identity. Two factor authentication protects against phishing, social engineering and password brute force attacks and secures your logins from attackers exploiting weak or stolen credentials.</p>

                       @if (session('error'))
                            <div class="alert alert-danger">
                                {{ session('error') }}
                            </div>
                        @endif
                        @if (session('success'))
                            <div class="alert alert-success">
                                {{ session('success') }}
                            </div>
                        @endif

                               <strong>Enter the pin from Google Authenticator Enable 2FA</strong><br/><br/>
                           <form class="form-horizontal" action="{{ route('2faVerify') }}" method="POST">
                               {{ csrf_field() }}
                               <div class="form-group{{ $errors->has('one_time_password-code') ? ' has-error' : '' }}">
                                   <label for="one_time_password" class="col-md-4 control-label">One Time Password</label>
                                   <div class="col-md-6">
                                       <input name="one_time_password" class="form-control"  type="text"/>
                                   </div>
                               </div>
                               <div class="form-group">
                                   <div class="col-md-6 col-md-offset-4">
                                        <button class="btn btn-primary" type="submit">Authenticate</button>
                                   </div>
                               </div>
                           </form>

                    </div>
                </div>
            </div>
        </div>
    </div>
@endsection
@extends('layouts.app')

@section('content')
    <div class="container">
        <div class="row">
            <div class="col-md-8 col-md-offset-2">
                <div class="panel panel-default">
                    <div class="panel-heading">Two Factor Authentication</div>
                       <div class="panel-body">
                           <p>Two factor authentication (2FA) strengthens access security by requiring two methods (also referred to as factors) to
 verify your identity.
Two factor authentication protects against phishing, social engineering and password brute force attacks and secures your logins from attackers
exploiting weak or stolen credentials.</p>

                       @if (session('error'))
                            <div class="alert alert-danger">
                                {{ session('error') }}
                            </div>
                        @endif
                        @if (session('success'))
                            <div class="alert alert-success">
                                {{ session('success') }}
                            </div>
                        @endif

                               <strong>Enter the pin from Google Authenticator Enable 2FA</strong><br/><br/>
                           <form class="form-horizontal" action="{{ route('2faVerify') }}" method="POST">
                               {{ csrf_field() }}
                               <div class="form-group{{ $errors->has('one_time_password-code') ? ' has-error' : '' }}">
                                   <label for="one_time_password" class="col-md-4 control-label">One Time Password</label>
                                   <div class="col-md-6">
                                       <input name="one_time_password" class="form-control"  type="text"/>
                                   </div>
                               </div>
                               <div class="form-group">
                                   <div class="col-md-6 col-md-offset-4">
                                        <button class="btn btn-primary" type="submit">Authenticate</button>
                                   </div>
                               </div>
                           </form>

                    </div>
                </div>
            </div>
        </div>
    </div>
@endsection
web.php routes file
Route::post('/2faVerify', function () {
    return redirect(URL()->previous());
})->name('2faVerify')->middleware('2fa');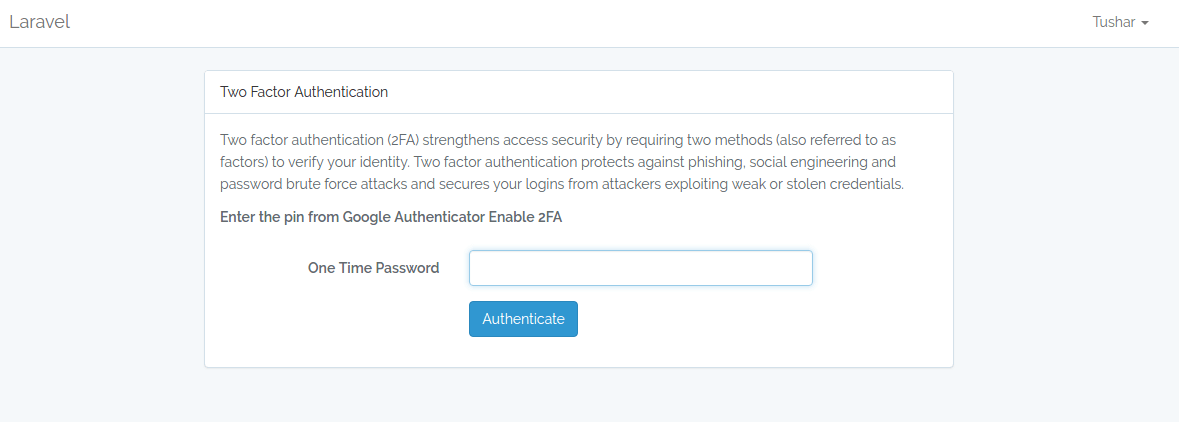
Demo
[caption id="attachment_976" align="aligncenter" width="600"] Laravel Two Factor Authentication (Google2FA) Demo[/caption]